Legendary Adventures

|
This article is incomplete. Please feel free to edit this article to add missing information and complete it. Reason: Missing music tables |

Legendary Adventures (Japanese: 伝説ポケモン編 Legendary Pokémon Adventure) is a mode in the main story of Pokémon Masters EX. Unlike the other modes in the main story, all the stories in Legendary Adventures are self-contained and can be played in any order. Chronologically, they all take place before the Villain Arc, with a few happening before or concurrently with the PML Arc. Each story focuses on a specific sync pair already formed with a Legendary Pokémon, or a character who forms a sync pair with a Legendary Pokémon over the course of the story. Completing all the story areas and battles will reward players with the featured sync pair, items to maximize the sync pair's potential and move level, and items to unlock the sync pair's level cap up to Level 125.
On February 28, 2025, an additional battle dubbed "An Upgraded Trial!" was added to all Legendary Adventures. These battles rewarded the player with Legendary Spirits and crystals for the event's respective sync pair, allowing them to upgrade these pairs to ![]() 6★ EX outside of their respective villain events.
6★ EX outside of their respective villain events.
The recommended level for taking on Legendary Adventures is level 30.
All stories found in Legendary Adventures previously appeared as legendary events. The script for the Legendary Adventures can be found here.
Lurking Shadow
This story was added to Legendary Adventures on November 24, 2021. It focuses on the sync pair Giovanni & Mewtwo.
Plot
The event starts with Giovanni asking Mewtwo to sow seeds of chaos.
At the Pokémon Center, Trista relays news of a strong sync pair causing trouble and warns the player to take caution when exploring the beach.
Brock, Misty, and the player go out to the beach to help stop the trouble. They overhear some Team Break masked men discuss how strong the Trainer is and wonder whether they can make him their boss. However, one of them reveals that he had previously stated not being interested as he was already leader of Team Rainbow Rocket. Brock and Misty interrupt their conversation and Misty realizes that this must mean that Giovanni has come to Pasio. Brock explains to the player that Giovanni is the leader of Team Rocket in Kanto. They decide to stop him but the Team Break thugs try to stop them and start a battle. After being defeated, the masked men leave.
Brock, Misty and the player head into the cave where Giovanni is. After some time, they eventually find him. Misty confronts Giovanni asking what he is up to despite Team Rocket having being disbanded. Giovanni is surprised that Team Rocket is disbanded and guesses he is doomed to be a criminal no matter which world he is in.
Giovanni reveals he was able to mine a sync stone from the cave. He reveals his aim to bend the power of the sync stone to his will and to unleash the hidden power in them. He brings out Mewtwo and battles them to see what the sync stone is capable of.
After the battle, Giovanni sees that it is possible for the bond of a sync pair to manifest great strength. Brock doubts Giovanni will give up on seeking power and believes he was not treating that as a serious battle. Giovanni remarks that the battle was a test run. He dares the player to follow him to for a rematch and then disappears with a snap of his fingers.
The player finally corners Giovanni in a cave. He admits being impressed with the team's full power and asks whether they would like to work with him. Brock does not want to get involved with his evil schemes. Giovanni understands their doubts and states he has been thinking about changing his ways and starting afresh in this new part of the world. Both Brock and Misty are skeptical but Brock suggests that the player could keep an eye on Giovanni by letting him join the team. Giovanni promises not to get involved with Team Break and just to enjoy the PML. As they leave, Giovanni reflects that he has been able to infiltrate their unit successfully and is still deciding whether to truly start afresh or to plan something else.
Area info
| Area name | Unlock condition | Completion Rewards |
|---|---|---|
| Available from start | ||
| Complete A New Plot | ||
| Complete Get to Giovanni! | ||
| Complete Mewtwo Strikes! | ||
| Complete Mewtwo Strikes! Round 2 |
Battles
| Name | Difficulty | Trainers | Pokémon | First-Time Rewards | Completion Rewards | ||||
|---|---|---|---|---|---|---|---|---|---|
| Left | Middle | Right | |||||||
| Get to Giovanni! | Normal |  Masked Man |
 Grumpig Weakness: |
 Gengar Weakness: |
 Mareanie Weakness: |
||||
| Mewtwo Strikes! | Hard |  Giovanni |
 Staraptor Weakness: |
 Mewtwo Weakness: |
 Drifloon Weakness: |
||||
| Mewtwo Strikes! Round 2 | Very Hard | ||||||||
| Take Down Giovanni! Round 1 | Super Hard | Giovanni |
 Solrock Weakness: |
Mewtwo Weakness: |
 Lunatone Weakness: |
||||
| Take Down Giovanni! Round 2 | Ultra Hard | (Giovanni & Mewtwo) |
|||||||
| An Upgraded Trial! | Ultra Hard |  Leaf Sygna Suit |
 Blue Sygna Suit |
 Red Sygna Suit |
 Venusaur Weakness: |
 Blastoise Weakness: |
 Charizard Weakness: |
(Giovanni & Mewtwo) |
|
Shop
| Item given | Item received | Max exchanges | |
|---|---|---|---|
 Giovanni Custom Voucher ×1 |
→ | 4 | |
 Mewtwo Crystal ×100 |
→ |  Power Boost ×1 Giovanni & Mewtwo |
Unlimited |
 Custom ★ Power-Up ×10 Giovanni & Mewtwo |
→ | 5★ Power-Up ×1 |
Unlimited |
Custom ★ Power-Up ×1 Giovanni & Mewtwo |
→ |  3★ Power-Up ×1 |
Unlimited |
Pure Hearts and Rainbow Wings

This story was added to Legendary Adventures on December 4, 2021. It focuses on the sync pair Silver & Ho-Oh.
Plot
The event starts with Sawyer spotting Ho-Oh on Pasio, before it vanishes. Ethan and Silver battle in a field when they see Ho-Oh fly overhead. Ethan decides to follow it, and he has Silver recruit the player to join them.
The player meets up with Ethan and Silver, and Ethan formally introduces Silver to the player. Silver is skeptical that they would be able to track down Ho-Oh all over Pasio, but Ethan thinks of someone they can ask for information on the Legendary Pokémon and runs off, with the other two following. Meanwhile, a group of Team Break members plot to find and catch Ho-Oh.
Ethan looks for one of the Kimono Girls from Johto for information on Ho-Oh, and he spots Valerie talking to Lance. She explains that she is not one of the Kimono Girls, but she does know about Ho-Oh. She notes the tension between Silver and Lance before describing some of the legends about Ho-Oh, and she suggests that it might be found at high elevations, based on its history with the Bell Tower and Burned Tower. She also advises that Ho-Oh will only reveal itself to purehearted Trainers. Ethan is excited to climb one of Pasio's mountains to search, but Silver declines and leaves. That evening, Silver muses on the beach that Ho-Oh would never appear before him.
Lance joins Silver on the beach, and he remarks that Silver has changed since the first time they met; as evident by Silver's relationship with his Sneasel, he has learned to value Pokémon as more than tools for battle and to bond with them. Silver rejects this, remembering his history and bringing to mind his father, Giovanni. Lance replies that Silver should believe in himself and tells him to make sure to meet up with Ethan and the player the next day. In the morning, Ethan tells Valerie and the player that Silver always shows up where he is because they are rivals. Silver finally arrives, and when they hear Ho-Oh's cry, Ethan takes off with Valerie, while Silver teams up with the player to climb the mountain to search. Team Break follows behind the group.
Later in the day, Silver notes that they still have not seen Ho-Oh, though they keep hearing its cry. He tells the player Ethan's passion used to aggravate him, but not anymore. They hear Ho-Oh again, and it comes down the mountain path to confront them. Silver intends to challenge Ho-Oh, but he gets a call from Ethan, who tells him Team Break is chasing him and Valerie and asks Silver to come help. Silver is torn between forfeiting his chance to battle Ho-Oh and leaving Ethan to fend for himself. Ethan tries to hold off the Team Break members with his Cyndaquil, but when Team Break is about to rush them, Silver's Sneasel jumps in. Silver taunts Team Break for ganging up on Trainers.
Ethan and Silver take out the rest of Team Break's Pokémon together, but their leader calls in reinforcements. Silver declares that he will continue to fight all opponents with the Pokémon he has trained, as his goal is to be the world's greatest Trainer,and the rest of the group give their support. Team Break prepares to rush them, but Ho-Oh's arrival prompts them to switch their focus to it instead. Ho-Oh drives them off with its flames, and when it does not fly off afterwards, Ethan believes it wants to join with one of them. Silver separates from the group, not wanting to see Ho-Oh join one of the others, but when Ethan calls him back, Silver sees Ho-Oh approaching him. Silver reluctantly accepts Ethan's praise, and he approaches Ho-Oh to join as a sync pair.
Area info
| Area name | Unlock condition | Completion Rewards |
|---|---|---|
| Available from start | ||
| Complete Oh, Ho-Oh! | ||
| Complete Ho-Oh's Challenge: Part 1 | ||
| Complete Ho-Oh's Challenge: Part 2 | ||
| Complete Ho-Oh's Challenge: Part 3 | ||
| Complete Ho-Oh's Challenge: Part 4 |
Battles
| Name | Difficulty | Trainer | Pokémon | First-Time Rewards | Completion Rewards | ||
|---|---|---|---|---|---|---|---|
| Left | Middle | Right | |||||
| Ho-Oh's Challenge: Part 1 | Normal | None |  Torkoal Weakness: |
 Ho-Oh Weakness: |
 Geodude Weakness: |
||
| Ho-Oh's Challenge: Part 2 | Hard | ||||||
| Ho-Oh's Challenge: Part 3 | Hard | ||||||
| Ho-Oh's Challenge: Part 4 | Very Hard | None |  Ponyta Weakness: |
Ho-Oh Weakness: |
 Slugma Weakness: |
||
| Ho-Oh's Challenge: Part 5 | Super Hard | ||||||
| Ho-Oh's Challenge: Part 6 | Ultra Hard | None |  Rapidash Weakness: |
Ho-Oh Weakness: |
 Vileplume Weakness: |
(Silver & Ho-Oh) |
|
| An Upgraded Trial! | Ultra Hard | Giovanni |
 Tyranitar Weakness: |
 Exeggutor Weakness: |
 Medicham Weakness: |
(Silver & Ho-Oh) |
|
Shop
| Item given | Item received | Max exchanges | |
|---|---|---|---|
 Silver Custom Voucher ×1 |
→ | 4 | |
 Ho-Oh Crystal ×100 |
→ | Power Boost ×1 Silver & Ho-Oh |
Unlimited |
Custom ★ Power-Up ×10 Silver & Ho-Oh |
→ | 5★ Power-Up ×1 |
Unlimited |
Custom ★ Power-Up ×1 Silver & Ho-Oh |
→ | 3★ Power-Up ×1 |
Unlimited |
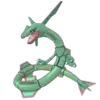
The Dragon That Rules the Sky
This story was added to Legendary Adventures on December 14, 2021. It focuses on the sync pair Zinnia & Rayquaza.
Plot
The event begins with Zinnia trying to locate Rayquaza at the glaciers.
At the Pokémon Center, Trista warns the player that there have been sightings of an unknown Dragon-type Pokémon near the glaciers. She claims that the Pokémon does not seem to have a Trainer, and is attacking anyone who comes near it.
Then player meets Professor Kukui at the glaciers, who has also come after having heard news of this Pokémon. He wonders why it is here with no Trainer and remarks that this is not the first time a lone Pokémon has suddenly appeared.
Zinnia then attacks out of nowhere. Kukui is surprised at the attack but Zinnia rebuts that she was attacked earlier by Team Break. Kukui reassures her that they are not with Team Break, but Zinnia still battles them to prevent them from passing through.
After the battle, Zinnia admits that she is here for Rayquaza. Kukui wants to help her in case Team Break reappears, but Zinnia asks them to stay out of the way and heads off. Concerned, they follow after her.
Although they are not interrupted by Team Break on the way, Kukui is still worried that Rayquaza will be too strong for Zinnia alone. When Rayquaza attacks, Kukui and the player help to protect Zinnia and her Salamence. Kukui heals Salamence. Zinnia then reveals that her reason for approaching Rayquaza is because she was previously unable to fulfil a mission to save the world with Rayquaza. When she had heard Rayquaza was in Pasio, it had felt like a second chance to her.
Reluctantly, Zinnia agrees to enlist the help of Kukui and the player. After they defeat Rayquaza, Zinnia opens her heart and asks Rayquaza to lend her its strength so that she could one day fulfill her mission.
Rayquaza joins Zinnia, but Zinnia feels that it joined under one condition—to battle Kukui and the player again.
Area info
| Area name | Unlock condition | Completion Rewards |
|---|---|---|
| Available from start | ||
| Complete Starry Nights, Dragon Flights | ||
| Complete Fight Now, Talk Later | ||
| Complete The Sky-Rending Dragon, Part 1 | ||
| Complete The Sky-Rending Dragon, Part 2 |
Battles
| Name | Difficulty | Trainer | Pokémon | First-Time Rewards | Completion Rewards | ||
|---|---|---|---|---|---|---|---|
| Left | Middle | Right | |||||
| Fight Now, Talk Later | Normal |  Zinnia |
 Deino Weakness: |
 Salamence Weakness: |
 Shieldon Weakness: |
||
| The Sky-Rending Dragon, Part 1 | Hard | None |  Aurorus Weakness: |
 Rayquaza Weakness: |
Deino Weakness: |
||
| The Sky-Rending Dragon, Part 2 | Very Hard | Zinnia |
|||||
| Take Down Zinnia! Round 1 | Super Hard | Zinnia |
Aurorus Weakness: |
Rayquaza Weakness: |
 Turtonator Weakness: |
||
| Take Down Zinnia! Round 2 | Ultra Hard | (Zinnia & Rayquaza) |
|||||
| An Upgraded Trial! | Ultra Hard |  Steven |
 Steelix Weakness: |
 Metagross Weakness: |
 Duraludon Weakness: |
(Zinnia & Rayquaza) |
|
Shop
| Item given | Item received | Max exchanges | |
|---|---|---|---|
 Zinnia Custom Voucher ×1 |
→ | 4 | |
 Rayquaza Crystal ×100 |
→ | Power Boost ×1 Zinnia & Rayquaza |
Unlimited |
Custom ★ Power-Up ×10 Zinnia & Rayquaza |
→ | 5★ Power-Up ×1 |
Unlimited |
Custom ★ Power-Up ×1 Zinnia & Rayquaza |
→ | 3★ Power-Up ×1 |
Unlimited |
New World Dilemma
This story was added to Legendary Adventures on December 24, 2021. It focuses on the sync pair Cyrus & Palkia.
Plot
Cyrus arrives on the island of Pasio, surmising that Pasio was not the world he desired. He encounters the player and Cheryl on the beach, and Cheryl recognises Cyrus as the leader of Team Galactic whose plans had been foiled in the Distortion World. However, Cyrus denies knowing about the Distortion World, and comments that he had been attempting to make a world without spirit using the powers of Dialga and Palkia, before being interrupted by a mysterious ring which had brought him to Pasio. Cyrus exclaims that he will create a new world regardless of any setbacks. Cheryl and the player attempt to defeat Cyrus in a battle, however they are defeated by Cyrus's Palkia. Cyrus tells them that they had lost because their judgment had been clouded by their spirit, which is a vague and incomplete thing. Cynthia comes to intervene, but Cyrus disappears.
Meanwhile, Cyrus is walking through a forest where he meets Sophocles and a friend's Rotom. The two share a conversation ranging from sync pairs, Pasio, inventions, and Rotom, before Cyrus begins to divulge about the crude and incomplete state of the current world. As Cyrus leaves, Elesa finds Sophocles and brings him to the Pokémon Center where they meet Cynthia and Cheryl. Cynthia predicts that Cyrus will want to search for Lear, in order to obtain the power of the source that had brought him to Pasio. Sophocles, determined to stop Cyrus, joins with the player and Cheryl to find Cyrus.
The three apprehend Cyrus at a desert, however, they soon begin to lose against the Legendary Pokémon Palkia. As Cyrus tries to get away, Cynthia, in her sygna suit, and her Kommo-o joins forces with the protagonists. She relays to Cyrus that her strength lies in the bonds that are born from spirit. Cynthia's sync stone begins to glow, and Kommo-o delivers a final blow against Palkia. After Cyrus's defeat, Sophocles comes up to Cyrus and explains to him that though there are sad and lonely moments, the spirit helps them to appreciate the happy moments even more because of this.
Area info
| Area name | Unlock condition | Completion Rewards |
|---|---|---|
| Available from start | ||
| Complete The Man from Another Dimension | ||
| Complete Take Down Cyrus! Round 1 | ||
| Complete Take Down Cyrus! Round 2 | ||
| Complete Take Down Cyrus! Round 3 | ||
| Complete Take Down Cyrus! Round 4 |
Battles
| Name | Difficulty | Trainer | Pokémon | First-Time Rewards | Completion Rewards | ||
|---|---|---|---|---|---|---|---|
| Left | Middle | Right | |||||
| Take Down Cyrus! Round 1 | Normal |  Cyrus |
 Gible Weakness: |
 Palkia Weakness: |
Deino Weakness: |
||
| Take Down Cyrus! Round 2 | Hard | ||||||
| Take Down Cyrus! Round 3 | Hard | ||||||
| Take Down Cyrus! Round 4 | Very Hard | Cyrus |
 Haxorus Weakness: |
Palkia Weakness: |
 Kingdra Weakness: |
||
| Take Down Cyrus! Round 5 | Super Hard | ||||||
| Take Down Cyrus! Round 6 | Ultra Hard | (Cyrus & Palkia) |
|||||
| Full-Force Battle! Round 1 | Super Hard |  Masked Man |
 Donphan Weakness: ↓  Vibrava Weakness: ↓ Salamence Weakness: |
 Garchomp Weakness: ↓ Kingdra Weakness: ↓  Dragonite Weakness: |
Solrock Weakness: ↓ Turtonator Weakness: ↓  Dragalge Weakness: |
None | |
| Full-Force Battle! Round 2 | Ultra Hard | None | |||||
| An Upgraded Trial! | Ultra Hard |  Cynthia |
 Gastrodon West Sea Weakness: |
Garchomp Weakness: |
Tyranitar Weakness: |
(Cyrus & Palkia) |
|
Shop
| Item given | Item received | Max exchanges | |
|---|---|---|---|
Cyrus Custom Voucher ×1 |
→ | 4 | |
 Palkia Crystal ×100 |
→ | Power Boost ×1 Cyrus & Palkia |
Unlimited |
Custom ★ Power-Up ×10 Cyrus & Palkia |
→ | 5★ Power-Up ×1 |
Unlimited |
Custom ★ Power-Up ×1 Cyrus & Palkia |
→ | 3★ Power-Up ×1 |
Unlimited |
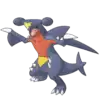
Father or Foe
This story was added to Legendary Adventures on January 4, 2022. It focuses on the sync pair Ghetsis & Kyurem.
Plot
Area info
| Area name | Unlock condition | Completion Rewards |
|---|---|---|
| Available from start | ||
| Complete A Visit from Ghetsis | ||
| Complete Challenge Ghetsis: Part 1 | ||
| Complete Challenge Ghetsis: Part 2 | ||
| Complete Challenge Ghetsis: Part 3 | ||
| Complete Challenge Ghetsis: Part 4 |
Battles
| Name | Difficulty | Team | Trainer | Pokémon | First-Time Rewards | Completion Rewards | ||
|---|---|---|---|---|---|---|---|---|
| Left | Middle | Right | ||||||
| Challenge Ghetsis: Part 1 | Normal | Any |  Ghetsis |
 Sneasel Weakness: |
 Kyurem Weakness: |
 Abomasnow Weakness: |
||
| Challenge Ghetsis: Part 2 | Hard | Any | ||||||
| Challenge Ghetsis: Part 3 | Hard | Any | ||||||
| Challenge Ghetsis: Part 4 | Very Hard | Any | ||||||
| And Yet... | — | Set | Giovanni |
Exeggutor Weakness: |
Mewtwo Weakness: |
 Nidoqueen Weakness: |
None | |
| Challenge Ghetsis: Part 5 | Super Hard | Any | Ghetsis |
Sneasel Weakness: |
Kyurem Weakness: |
Abomasnow Weakness: |
||
| Challenge Ghetsis: Part 6 | Ultra Hard | Any |  Hydreigon Weakness: |
Kyurem Weakness: |
Haxorus Weakness: |
(Ghetsis & Kyurem) |
||
| Challenge Team Break: Part 1 | Super Hard | Any |  Masked Woman |
 Aerodactyl Weakness: |
Tyranitar Weakness: |
 Gyarados Weakness: |
None | |
| Challenge Team Break: Part 2 | Ultra Hard | Any | None | |||||
| An Upgraded Trial! | Ultra Hard | Any |  N |
 Krookodile Weakness: |
 Tentacruel Weakness: |
 Muk Weakness: |
(Ghetsis & Kyurem) |
|
Set teams
| Set team (And Yet...) | |||||
|---|---|---|---|---|---|
| Left |
Middle |
Right | |||
Nate & Braviary |
N & Zekrom |
Ghetsis & Kyurem | |||
| 5★ | Lv. 100 | 5★ | Lv. 100 | 5★ | Lv. 100 |
| Tactics | |||||
| 3rd | 2nd | 1st | |||
| Moves | |||||
| (standard) | (standard) | (standard) | |||
| Skills | |||||
| (standard) | (standard) | (standard) | |||
| Theme Skills | |||||
Shop
| Item given | Item received | Max exchanges | |
|---|---|---|---|
 Ghetsis Custom Voucher ×1 |
→ | 4 | |
 Kyurem Crystal ×100 |
→ | Power Boost ×1 Ghetsis & Kyurem |
Unlimited |
Custom ★ Power-Up ×10 Ghetsis & Kyurem |
→ | 5★ Power-Up ×1 |
Unlimited |
Custom ★ Power-Up ×1 Ghetsis & Kyurem |
→ | 3★ Power-Up ×1 |
Unlimited |
Give and Take
This story was added to Legendary Adventures on January 14, 2022. It focuses on the sync pair Professor Sycamore & Xerneas.
Plot
Area info
| Area name | Unlock condition | Completion Rewards |
|---|---|---|
| Available from start | ||
| Complete A Shadow Chasing Eternal Life | ||
| Complete Challenge Lysandre: Part 1 | ||
| Complete Challenge Professor Sycamore: Part 1 | ||
| Complete Challenge Professor Sycamore: Part 2 | ||
| Complete Challenge Lysandre: Part 2 |
Battles
| Name | Difficulty | Trainer | Pokémon | First-Time Rewards | Completion Rewards | ||
|---|---|---|---|---|---|---|---|
| Left | Middle | Right | |||||
| Challenge Lysandre: Part 1 | Normal |  Lysandre |
Sneasel Weakness: |
 Honchkrow Weakness: |
Deino Weakness: |
||
| Challenge Professor Sycamore: Part 1 | Hard |  Professor Sycamore |
 Roserade Weakness: |
 Bulbasaur Weakness: |
Roserade Weakness: |
||
| Challenge Professor Sycamore: Part 2 | Hard | ||||||
| Challenge Lysandre: Part 2 | Very Hard | Lysandre |
Sneasel Weakness: |
Honchkrow Weakness: |
Deino Weakness: |
||
| Challenge Professor Sycamore: Part 3 | Super Hard | Professor Sycamore |
Roserade Weakness: |
Bulbasaur Weakness: |
Roserade Weakness: |
||
| Challenge Pasio's Trainers: Part 1 | Ultra Hard |  Ace Trainer Vernon |
 Venomoth Weakness: |
 Golisopod Weakness: |
 Xatu Weakness: |
(Professor Sycamore & Xerneas) |
|
| Full-Force Battle! Round 1 | Super Hard | Masked Man |
 Throh Weakness: ↓  Kadabra Weakness: ↓ Solrock Weakness: |
 Pinsir Weakness: ↓  Drifblim Weakness: ↓  Chandelure Weakness: |
 Sawk Weakness: ↓  Mismagius Weakness: ↓ Solrock Weakness: |
None | |
| Full-Force Battle! Round 2 | Ultra Hard | None | |||||
| An Upgraded Trial! | Ultra Hard |  Malva |
 Probopass Weakness: |
 Talonflame Weakness: |
Steelix Weakness: |
(Professor Sycamore & Xerneas) |
|
Shop
| Item given | Item received | Max exchanges | |
|---|---|---|---|
 Sycamore Custom Voucher ×1 |
→ | 4 | |
 Xerneas Crystal ×100 |
→ | Power Boost ×1 Professor Sycamore & Xerneas |
Unlimited |
Custom ★ Power-Up ×10 Professor Sycamore & Xerneas |
→ | 5★ Power-Up ×1 |
Unlimited |
Custom ★ Power-Up ×1 Professor Sycamore & Xerneas |
→ | 3★ Power-Up ×1 |
Unlimited |
The Beast That Devours the Sun
This story was added to Legendary Adventures on January 24, 2022. It focuses on the sync pair Scottie & Solgaleo or Bettie & Solgaleo, depending on the player's gender.
Plot
The event starts with Rachel believing that Team Break have teleported a strong sync pair to Pasio.
At the Pokémon Center, Professor Bellis greets the player and tells them about the rumors of a strong Pokémon that has arrived at a mountain peak. Like Rachel, Professor Bellis believes that it must be a new sync pair and wonders who the Trainer is.
The player then joins Hau and Roxie early in the morning to catch the sunrise up on the mountain as well as to see this mysterious Pokémon. After defeating a Hiker itching for a battle, the trio arrive at the peak where many Trainers have gathered. Just as the sun rises, Solgaleo appears but with no sync pair Trainer in sight. Along with a wild Ponyta and Solrock that have come along with Solgaleo, the three Pokémon defeat all the Trainers on the mountain peak.
Solgaleo then challenges the player, Hau, and Roxie to a battle. After the player defeats Solgaleo, the Sunne Pokémon returns for a repeat battle, having re-energised itself by taking up the sunshine. After multiple battles, Solgaleo appears satisfied with its fill of battles and the trio head back down the mountain. However, Solgaleo follows them down, and Hau realises that Solgaleo would like to become a sync pair with the player.
Area info
| Area name | Unlock condition | Completion Rewards |
|---|---|---|
| Available from start | ||
| Complete The Sunrise Calls | ||
| Complete Battle before Daybreak! | ||
| Complete Solgaleo's Challenge: Part 1 | ||
| Complete Solgaleo's Challenge: Part 2 | Scottie/Bettie & Solgaleo |
Battles
| Name | Difficulty | Trainer | Pokémon | First-Time Rewards | Completion Rewards | ||
|---|---|---|---|---|---|---|---|
| Left | Middle | Right | |||||
| Battle before Daybreak! | Normal |  Rising Star Naomi |
 Magnemite Weakness: |
 Pikachu Weakness: |
 Phanpy Weakness: |
||
| Solgaleo's Challenge: Part 1 | Hard |  Solgaleo |
Ponyta Weakness: |
 Solgaleo Weakness: |
Solrock Weakness: |
||
| Solgaleo's Challenge: Part 2 | Very Hard | ||||||
| Take Down Solgaleo! Round 1 | Super Hard | Solgaleo |
 Houndoom Weakness: |
Solgaleo Weakness: |
Rapidash Weakness: |
||
| Take Down Solgaleo! Round 2 | Ultra Hard | (Scottie/Bettie & Solgaleo) |
|||||
| An Upgraded Trial! | Ultra Hard |  Lusamine |
 Crabominable Weakness: |
 Bewear Weakness: |
 Machamp Weakness: |
(Scottie/Bettie & Solgaleo) |
|
Shop
| Item given | Item received | Max exchanges | |
|---|---|---|---|
 Solgaleo Custom Voucher ×1 Scottie/Bettie & Solgaleo |
→ | 4 | |
 Solgaleo Crystal ×100 |
→ | Power Boost ×1 Scottie/Bettie & Solgaleo |
Unlimited |
Custom ★ Power-Up ×10 Scottie/Bettie & Solgaleo |
→ | 5★ Power-Up ×1 |
Unlimited |
Custom ★ Power-Up ×1 Scottie/Bettie & Solgaleo |
→ | 3★ Power-Up ×1 |
Unlimited |
Howling Shield of Eternity
This story was added to Legendary Adventures on February 4, 2022. It focuses on the sync pair Hop & Zamazenta.
Plot
Area info
| Area name | Unlock condition | Completion Rewards |
|---|---|---|
| Available from start | ||
| Complete A New Visitor | ||
| Complete Challenge Gloria: Part 1 | ||
| Complete Challenge Gloria: Part 2 | ||
| Complete Challenge Gloria: Part 3 | ||
| Complete Challenge Gloria: Part 4 |
Battles
| Name | Difficulty | Trainer | Pokémon | First-Time Rewards | Completion Rewards | ||||
|---|---|---|---|---|---|---|---|---|---|
| Left | Middle | Right | |||||||
| Challenge Gloria: Part 1 | Normal |  Gloria |
 Goomy Weakness: |
 Kommo-o Weakness: |
Vibrava Weakness: |
||||
| Challenge Gloria: Part 2 | Hard | ||||||||
| Challenge Gloria: Part 3 | Hard | ||||||||
| Challenge Gloria: Part 4 | Very Hard | ||||||||
| Challenge Gloria: Part 5 | Super Hard | ||||||||
| Challenge Raihan | Ultra Hard |  Raihan |
 Grimmsnarl Weakness: |
 Flygon Weakness: |
 Alcremie Weakness: |
(Hop & Zamazenta) |
|||
| Challenge Sygna Suit Leon: Part 1 | Super Hard |  Hop |
 Leon Sygna Suit |
Gloria |
 Zamazenta Crowned Shield Weakness: |
 Eternatus Weakness: |
 Zacian Crowned Sword Weakness: |
None | |
| Challenge Sygna Suit Leon: Part 2 | Ultra Hard | None | |||||||
| An Upgraded Trial! | Ultra Hard |  Victor |
 Leon |
Gloria |
 Rillaboom Weakness: |
Charizard Weakness: |
 Inteleon Weakness: |
(Hop & Zamazenta) |
|
Shop
| Item given | Item received | Max exchanges | |
|---|---|---|---|
Hop Custom Voucher ×1 |
→ | 4 | |
 Zamazenta Crystal ×100 |
→ | Power Boost ×1 Hop & Zamazenta |
Unlimited |
Custom ★ Power-Up ×10 Hop & Zamazenta |
→ | 5★ Power-Up ×1 |
Unlimited |
Custom ★ Power-Up ×1 Hop & Zamazenta |
→ | 3★ Power-Up ×1 |
Unlimited |
Medals
| Event | Medal | Conditions | |
|---|---|---|---|
| Image | Name | ||
| Lurking Shadow | 
|
1★ Lurking Shadow | Complete the following single-player area: A Questionable Alliance |
| Pure Hearts and Rainbow Wings | 
|
1★ Pure Hearts and Rainbow Wings | Complete the following single-player area: A Pure Heart Revealed |
| The Dragon That Rules the Sky | 
|
1★ The Dragon That Rules the Sky | Complete the following single-player area: A New Beginning |
| New World Dilemma | 
|
1★ New World Dilemma | Complete the following single-player area: A Perfect, Complete Answer |

|
2★ New World Dilemma | Complete the following single-player area on Super Hard: New World Dilemma Full-Force Battle! Round 1 | |

|
3★ New World Dilemma | Complete the following single-player area on Ultra Hard: New World Dilemma Full-Force Battle! Round 2 | |

|
Defender of Spirit | Complete the following area with 6 or fewer sync pairs falling to 0 HP: Full-Force Battle! Round 2 | |
| Father or Foe | 
|
1★ Father or Foe | Complete the following single-player area: And Yet... |

|
2★ Father or Foe | Complete the following single-player area on Ultra Hard: Father or Foe Challenge Ghetsis: Part 6 | |

|
3★ Father or Foe | Complete the following single-player area on Super Hard: Father or Foe Challenge Team Break: Part 1 | |

|
Resonating Heart | Complete single-player: Challenge Team Break: Part 2 with 2 or more sync pairs that share the following theme • Unova | |
| Give and Take | 
|
1★ Give and Take | Complete the following single-player area: Flames of Conviction |

|
2★ Give and Take | Complete the following single-player area on Super Hard: Give and Take Full-Force Battle! Round 1 | |

|
3★ Give and Take | Complete the following single-player area on Ultra Hard: Give and Take Full-Force Battle! Round 2 | |

|
Clash of Convictions | Complete the following area with 6 or fewer sync pairs falling to 0 HP: Full-Force Battle! Round 2 | |
| The Beast That Devours the Sun | 
|
1★ The Beast That Devours the Sun | Complete the following single-player area: A Shining New Friend |
| Howling Shield of Eternity | 
|
1★ Howling Shield of Eternity | Complete the following single-player area: Strongest Siblings |

|
2★ Howling Shield of Eternity | Complete the following single-player area on Super Hard: Howling Shield of Eternity Challenge Sygna Suit Leon: Part 1 | |

|
3★ Howling Shield of Eternity | Complete the following single-player area on Ultra Hard: Howling Shield of Eternity Challenge Sygna Suit Leon: Part 2 | |

|
Eternal Ties | Complete single-player: Challenge Sygna Suit Leon: Part 2 with 2 or more sync pairs that share the following theme • Galar | |
Trivia
- Most of the "An Upgraded Trial!" battles are copied from Battle Challenges in past events:
- The trial in Lurking Shadow is copied from We Should Battle!.
- The trial in Pure Hearts and Rainbow Wings is copied from Team Rocket Attacks.
- The trial in New World Dilemma is copied from Travelers from a Distant Past.
- The trial in Father or Foe is copied from Researcher and Seeker.
- The trial in Give and Take is copied from Go, Go, Team Flare!.
- The trial in The Beast That Devours the Sun is copied from People Protecting Pokémon.
- The trial in Howling Shield of Eternity is copied from Fight for the Future Together.
- The "An Upgraded Trial" battle in The Dragon That Rules the Sky is the same as Steven's Ground-weak team in the Hoenn Challenge.
Related articles
| This article is part of Project Sidegames, a Bulbapedia project that aims to write comprehensive articles on the Pokémon Sidegames. |